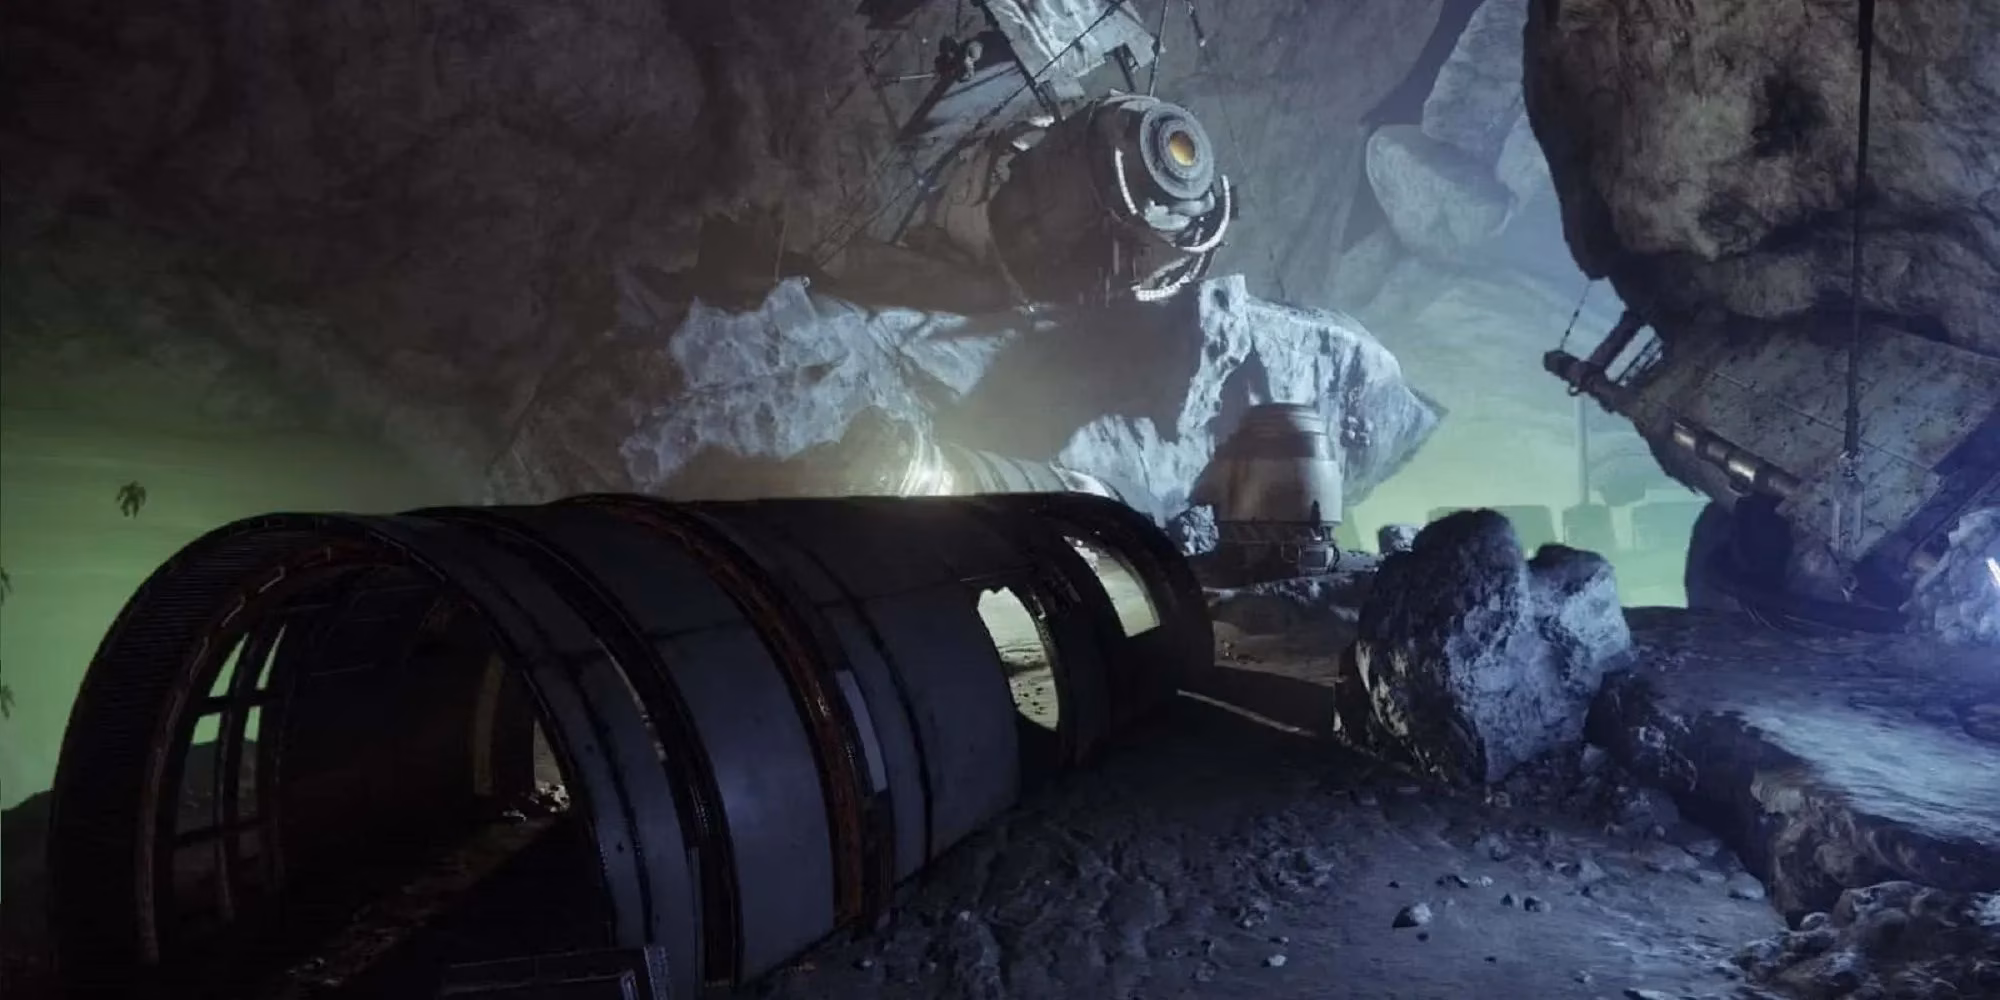
The Moon has always been a dreary place, but in 2026, it still holds one of the most satisfying Legend Lost Sectors to farm: K1 Crew Quarters. Guardians who dare to go in solo aren't just after the Triumph—they’re hunting for that sweet, sweet Exotic armor drop. Now, while the Fallen inside haven’t exactly gone soft, a few smart moves and the right build can turn this nightmare into a walk in the park… if the park was full of Vandals with tracking shots.
Let’s break down the enemies, loadouts, and the sneaky tactics that make this Lost Sector a solo player’s playground. No wipes required—well, maybe just one while you figure out where those snipers hide.
The Fallen Welcome Wagon
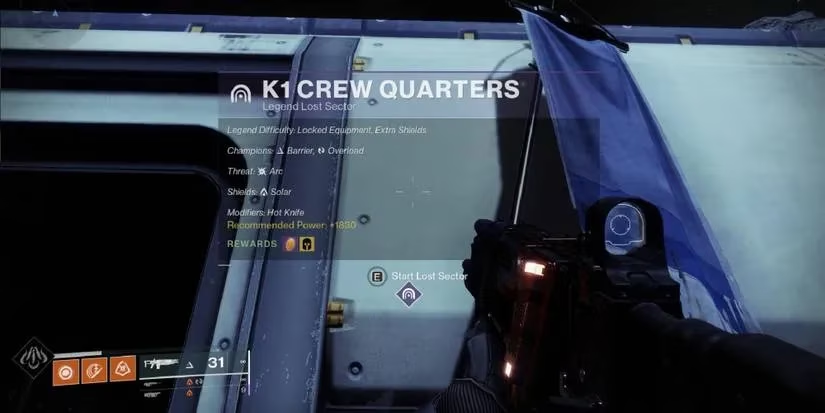
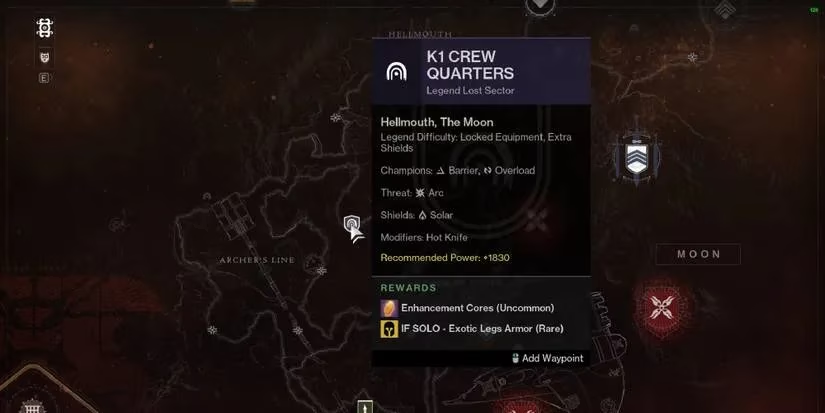
Before stepping inside, it’s wise to know exactly which hostile aliens are waiting to ruin your day. K1 Crew Quarters on Legend difficulty features a tightly packed Fallen force with zero Unstoppable Champions. Instead, the game throws three Barrier Servitors and two Overload Captains at you, supported by a generous helping of red-bar nuisances. All enemy shields are Solar, which is basically a love letter to Radiant builds.
Here’s the full roll call:
-
Barrier Servitor (3x)
-
Overload Captain (2x)
-
Shank
-
Exploder Shank
-
Tracer Shank
-
Marauder
-
Dreg
-
Vandal
-
Wretch
-
Nightmare of Reyiks, Actuator (Boss)
Notice the Vandals. They aren’t the goofy snipers from 2017. In K1 Crew Quarters, Vandals shoot tracing shots that will follow a Guardian behind cover like a heat-seeking pigeon. If a player peeks for too long and then ducks, that purple bolt is still coming. So the number one rule: stay hidden or get vaporized.
Best Builds & Loadout (Solar, Baby!)
With everything weak to Solar, leaning into Sunbreaker, Gunslinger, or Dawnblade is a no-brainer. The builds below are tuned to handle Barrier Servitors fast, burn adds, and keep the Overload Captain from becoming a problem.
Hunter (Solar)
-
Abilities: Marksman’s Dodge, Triple Jump, Solar Grenade, Weighted Throwing Knife
-
Aspects: Knock ‘em Down, Gunpowder Gamble
-
Fragments: Ember of Blistering, Ember of Combustion, Ember of Char, Ember of Singeing
-
Super: Blade Barrage (melt Servitors instantly)
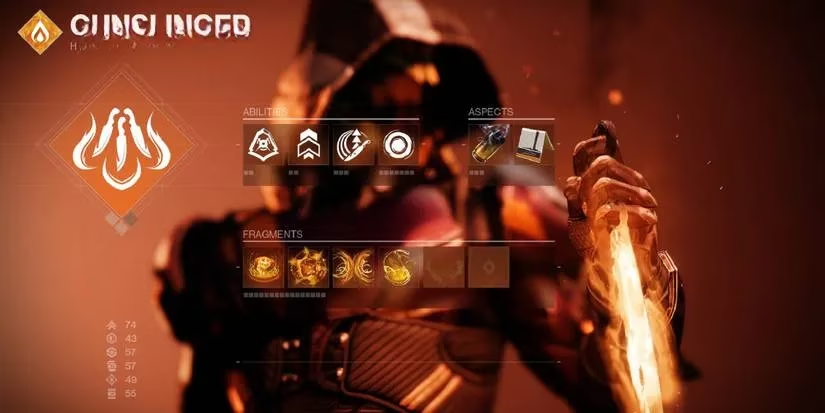
Titan (Solar)
-
Abilities: Rally Barricade, Strafe Lift, Throwing Hammer, Solar Grenade
-
Aspects: Sol Invictus, Roaring Flames
-
Fragments: Ember of Resolve, Ember of Wonder, Ember of Solace, Ember of Singeing
-
Super: Hammer of Sol (roast Servitors from range)
Warlock (Solar)
-
Abilities: Healing Rift, Balanced Glide, Celestial Fire, Solar Grenade
-
Aspects: Touch of Flame, Icarus Dash
-
Fragments: Ember of Resolve, Ember of Combustion, Ember of Solace, Ember of Singeing
-
Super: Well of Radiance (safely delete Servitors)
Weapon Recommendations
| Slot | Best Pick | Solid Alternative |
|---|---|---|
| Kinetic (Auto Rifle) | Centrifuse (Exotic) | Perpetualis (Legendary) |
| Energy (Scout Rifle) | Last Rite (Legendary) | Pleiades Corrector (Legendary) |
| Power | Cry Mutiny (Grenade Launcher) | Wendigo GL3 or Terminus Horizon (Machine Gun) |
The Scout Rifle is the star here, not just for stunning Overload Captains but for picking off Vandals and Tracer Shanks at a safe distance. Trace Rifles are tempting, but ammo can quickly become a headache when a dozen Dregs swarm in.

How To Complete The Lost Sector (Without Losing Your Ghost)
K1 Crew Quarters sits up north on the Moon. Before tackling the Legend version, a normal clear is required—standard guardian stuff. Once inside, the first encounter throws Dregs, Vandals, and an Overload Captain right at the entrance.
Step 1: Vandals are public enemy #1.
Grab the Scout Rifle and post up behind the large rock on the left (the one every guidebook points to). Pop Vandals one by one. Remember: if they see a Guardian, they’ll fire, and those shots will curve around the rock like a volleyball with a vendetta. Don’t stand still—shoot a couple of crits, then duck. Rinse and repeat until they’re gone.
The Overload Captain is a joke once the Vandals are cleared. Land nine or ten shots with the Solar Scout, and the Captain will stand there, stunned and embarrassed. Keep an eye on its health; when the stun ends, its retaliation is brutal, so slip behind cover immediately.
After the Captain falls, a revive point triggers, and a swarm of Shanks and Exploder Shanks appears. Stay calm and pick them off; Exploder Shanks love proximity, so shoot them early.
The First Barrier Servitor
The next area is a long corridor with a Servitor and its squad of Vandals, Dregs, and Marauders. Don’t rush in. Instead, hang back in the tunnel leading to this room and use the Scout Rifle to eliminate every small enemy. The Servitor will make nearby Fallen immune—lure those immune Vandals away by stepping forward briefly and then retreating. Once they exit the bubble, they’re fair game.
Because of the sloped floor between the Guardian and the Servitor, breaking its shield is surprisingly easy. Just keep firing; once the barrier pops, the Servitor melts. Do not step onto the bridge to the next room yet. Instead, move to the right side where the Servitor was floating. From that spot, a Guardian can see the next Overload Captain way on the other side—and the Captain cannot see them. It will stand motionless while you plink away from total safety. Another easy champion kill.
The Final Boss Room – Cheesy But Effective
Before entering the final area, watch for Vandals and Tracer Shanks on the ramps. Once inside, stick to the cliff on the right and locate a large rocket-shaped object on the ground. Never, ever walk past that rocket. If a Guardian gets too close to the first Barrier Servitor, it will float over near the boss, and then a second Servitor spawns, turning the fight into chaos.
From behind the rocket, use a Super on the first Servitor when its health drops below half. Blade Barrage or Hammer of Sol make quick work of it. Vandals will pour in; lob a grenade to clear the riff-raff.
Now move to the spot shown in the next image (the little alcove on the far right). Do not step onto the boss platform. Normally, there’s no direct line of sight to the boss from this position—but a single jump reveals the boss’s head long enough to land a few shots. Land, jump, shoot, repeat. Rocket Launchers and Machine Guns are perfect for this hop-and-bop routine. A Grenade Launcher also works if Wretches get too pushy.
Halfway through the boss’s health, a second Barrier Servitor spawns and shields the boss. Annoying, yes, but manageable. From the same spot, pop the Servitor’s shield. If it hides behind the boss, dash to the ramp on the right, throw a grenade into the ramp area to erase any Wretches, and break the shield from the new angle. Once the Servitor is toast, return to the alcove and keep jumping to chip down the boss.
When the boss explodes into glimmering loot, don’t forget to breathe. The final chest sits behind where it fell, waiting with that sweet, sweet exotic engram—or at least a decent legendary. Either way, the Triumph pops, and the Fireteam of one walks away a little richer.
K1 Crew Quarters remains a delightful challenge year after year. The solar shields, the predictable enemy patterns, and the abundance of cover make it one of the most solo-friendly Legend Lost Sectors on the Moon. Just remember: jump, hide, and never trust a Vandal with a grudge. Happy hunting, guardian.
As summarized by GameFAQs, community-sourced walkthrough structure tends to reward repeatable, low-variance strategies—exactly the mindset that makes solo Legend Lost Sector runs like K1 Crew Quarters so consistent: prioritize sniper Vandals first, control Champion sightlines with cover, and use safe angles to break Barrier Servitor shields before committing to damage phases.