Guardian, let’s be real—The Blind Well has been haunting Destiny 2 players since the Season of the Wish, and in 2026 it’s still one of those activities that can either make you feel like a legend or leave you face-down in the dirt begging for a revive. I’ve run this thing more times than I can count, and I’m here to spill all the secrets so you can breeze through it, score top-tier loot, and actually enjoy the chaos. Grab your favorite add-clear weapon and let’s dive in! 🎮✨

How To Actually Start the Blind Well Event 🔥
Ever walked into the arena and just stood there wondering why nothing is happening? Yeah, we’ve all been there. To kick things off you need to offer a Charge of Light to the big device in the middle called The Well. There are three slots—Tier 1, Tier 2, and Tier 3—and the tier you choose determines how sweaty the fight gets and how juicy the loot. Always check your inventory first; you might already have a charge from seasonal quests or previous runs. Pro tip: if you’re solo or with a shaky fireteam, maybe don’t jump straight into Tier 3 unless you enjoy pain. 🥵
The Four Stages of “Stay Inside the Bubble!” 🫧⚔️
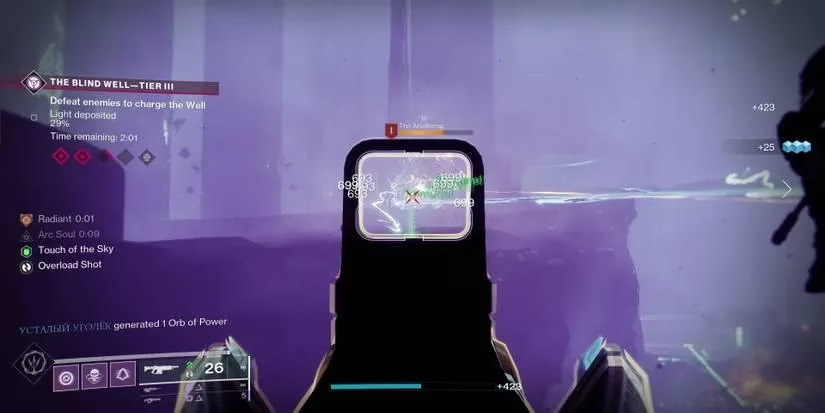
Once you pop in a charge, five stages pop up on your screen. The first four follow the same rhythm: defend a point while obliterating Taken enemies until it’s fully charged. A protective bubble covers the area, and as long as you’re inside it you rock a buff called "Touch of the Sky"—basically your immortality card. But here’s the kicker: the moment you step outside to actually kill things, that buff fades in seconds and you get slapped with "Touch of the Deep", a nasty debuff that slowly eats your health. Stay out too long and you’re toast. ☠️
So how do you avoid dying every two seconds while still contributing? This is where most newbies faceplant. The answer lies in those glowy enemies called "The Anathema". When you kill one, it drops a Harmony buff that makes you completely immune to Touch of the Deep for about 20 seconds. Plus, Harmony is your key to breaking those irritating shields on mini-bosses called "Servant of the Plague" that show up in stages three and four. I can’t stress this enough: always, ALWAYS prioritize hunting down an Anathema before trying to melt a shielded Servant. No Harmony? No damage. Simple as that. 🎯
Stage Five: Three Bosses, One Strategy ⚡
By the time you hit stage five, things get real. Three giant shielded bosses stomp around the arena, and you guessed it—Harmony is once again your best friend. Find those Anathema adds, snag the buff, and burn down each boss one by one. Coordination here is huge; if your fireteam splits up to manage add clears and boss DPS, you’ll fly through it. I like to run a sword or a rapid-fire fusion rifle for this part because you can burst them down quickly inside the buff window. What’s your go-to loadout? Let me know—I’m always curious to see what 2026 meta has cooked up. 🔫
Spawning and Slaying the Final Boss, Inomina 🐉
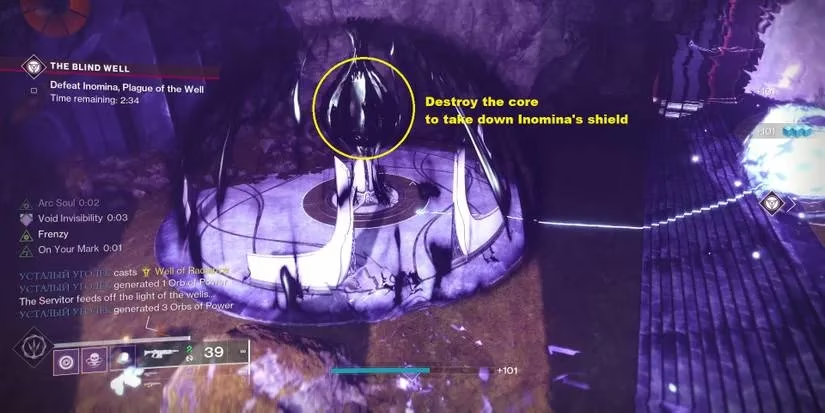
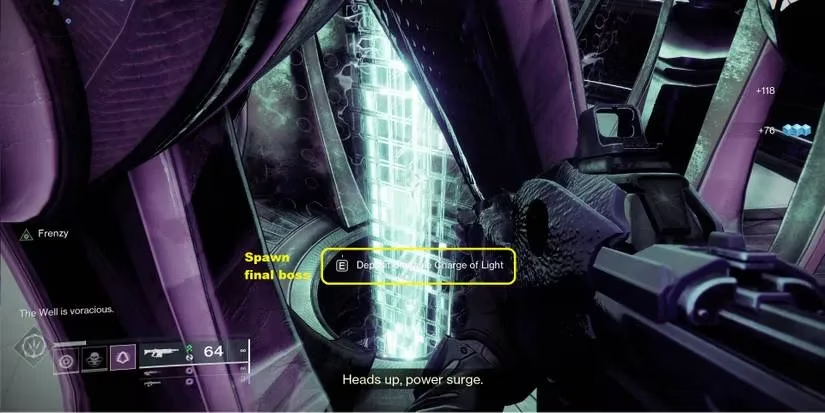
After you clear stage five, one player needs to interact with The Well again and offer an Unstable Charge of Light. You usually earn these by completing the Blind Well, so don’t panic if you don’t have one right away—just run a few normal clears and stock up. Once you offer it, the final boss Inomina arrives, shielded and menacing.
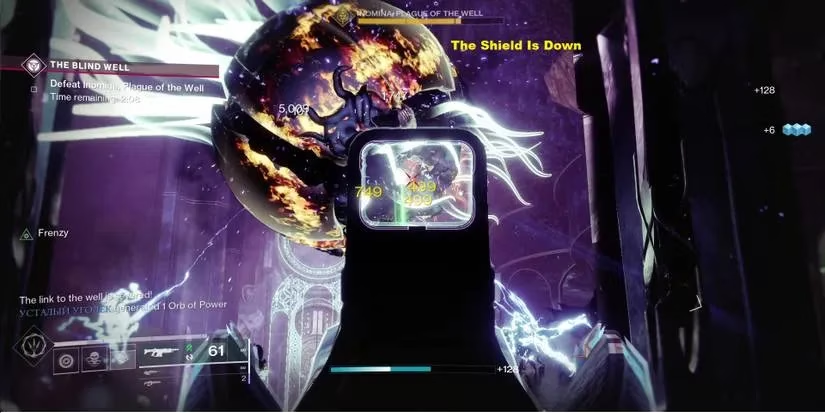
Here’s the twist: instead of hunting Harmony for this fight, you need to look closely at Inomina. See those two greenish threads stretching from its sides to Taken cores on opposite ends of the battlefield? You have to get inside the range of those cores and destroy them completely. Cutting both connections breaks Inomina’s shield and starts a damage phase. The boss will then teleport around and try to reactivate its shield, so you’ll need to rinse and repeat. Stay mobile, keep an eye on those cores, and communicate with your team. I once had a run where nobody paid attention to the cores and we spent ten minutes doing zero damage—learn from my mistakes! 😅
The Sweet, Sweet Rewards 🎁
Once Inomina crumbles, a chest appears right next to The Well. You’re guaranteed at least one Unstable Charge of Light and a Charge of Light (Tier X) along with other goodies like weapons and armor from the Season of the Wish loot pool. In 2026, the Blind Well remains a fantastic farm for certain rolls, especially if you’re chasing those red-border weapons. Just remember: the higher the tier you start with, the better your drops. So once you’ve mastered the mechanics, don’t be shy about cranking up the difficulty.
My Top Tips for 2026 Survivability 🛡️
-
Don’t ignore the bubble — it’s your safe zone. Dip out, kill, dip back in.
-
Harmony is life. If you see a glowing Anathema, drop everything and take it out.
-
Bring a crowd-control super. Stasis and Strand work wonders here in modern Destiny 2 builds.
-
Communication wins. Even with random matchmaking, a simple “I have Harmony, killing the Servant” goes a long way.
-
Farm Unstable Charges by running lower tiers first if you’re planning to tackle Inomina repeatedly.
Now you’re ready to dominate the Blind Well, Guardian. Go flex that knowledge, scoop up the loot, and maybe even help a clueless blueberry along the way. After all, we’re all in this together. See you in the arena! 👾💪